
How to Adjust a Glock Sight: A Complete Guide
Posted by XS Sights on Sep 8th 2023
Accuracy is important in any shooting discipline. From hunting to target shooting to law enforcement to civilian self-defense, accuracy is king. Hitting one’s target is, after all, the ultimate goal of shooting. An inaccurate shot can result in wounded game, the loss of a match, or failure to stop a threat before they are able to harm you. An inaccurate shot can also mean hitting something you didn’t mean to, one of the most severe negative outcomes.
Remember that you are legally, morally, and financially responsible for every bullet that leaves your muzzle, and everything it hits. Accuracy is in the hands of the shooter. You don’t want to handicap yourself with poor equipment, though. That’s why it’s important to have a good set of sights and make sure that they are kept in the correct adjustment.
Everyone thinks about adjusting rifle sights. Just yesterday I was at the range and a group of four guys – grandpa, dad, and two teenage boys – were sighting in deer rifles. There are myriad articles online about various zeros for AR-15s, AR-10s, pistol-caliber carbines, and plenty more. Very few people give much thought to “zeroing” their Glock, however. This is often because the sights are “fixed,” and usually well-regulated from the factory.
This is not always the case. Sights may be defective from the factory (as is the case with a Glock 48 that I own). Glock pistol sights may be poorly adjusted. Factory sights may not play well with your preferred ammunition. Whatever the reason, it is sometimes necessary to adjust your pistol sights. XS Sights offers not only the best, most innovative sights on the market, we also offer sight adjustment tools to make the job easy, efficient, and above all, correct!
The Anatomy of Glock Sights
There are several varieties of Glock sights. All consist of a simple front blade and a rear notch arrangement. The rear sight is drifted into a dovetail at the back of the slide, and it should be centered, left-to-right, in the dovetail. The front sight screws onto the pistol at the front of the slide.
The most common type of sights on a Glock pistol are the plastic “dovetail protectors,” as they are jokingly called. These sights are polymer and intended to be replaced. They are not very durable and I’ve personally seen both front and rear sights broken off. These sights are identifiable by being plastic, having a white dot on the front sight, and a white outline on the rear notch. Again, plastic sights are NOT acceptable for serious – i.e. duty or defensive – purposes where your life is on the line.
Next up, Glock offers steel sights. It’s pretty rare to see these, and if you really want them, you may have to special order them. Glock also offers night sights which are provided by Ameriglo. There is nothing wrong with these sights – they are rugged and glow in the dark – but they are fairly dated in design and could definitely be better. The advantage they offer over the plain steel sights is three glow-in-the-dark tritium tubes, allowing one to see the sights in low light or darkness.

Good sights are key to good accuracy, and well-designed sights can help you achieve both speed and accuracy. Sights like XS Sights’ R3D Night Sights and F8 Night Sights offer a huge upgrade over the factory Glock options. Both of these sights have an ultra-high-visibility, green (R3D) or orange (R3D and F8) front sight, making it very easy to see during daylight or at night. The front sight is also photoluminescent, meaning it will glow after being exposed to light like the sunlight or a blast from your Surefire handheld. They also have a tritium vial, so even if you find yourself in total darkness, the front sight will still glow brightly.
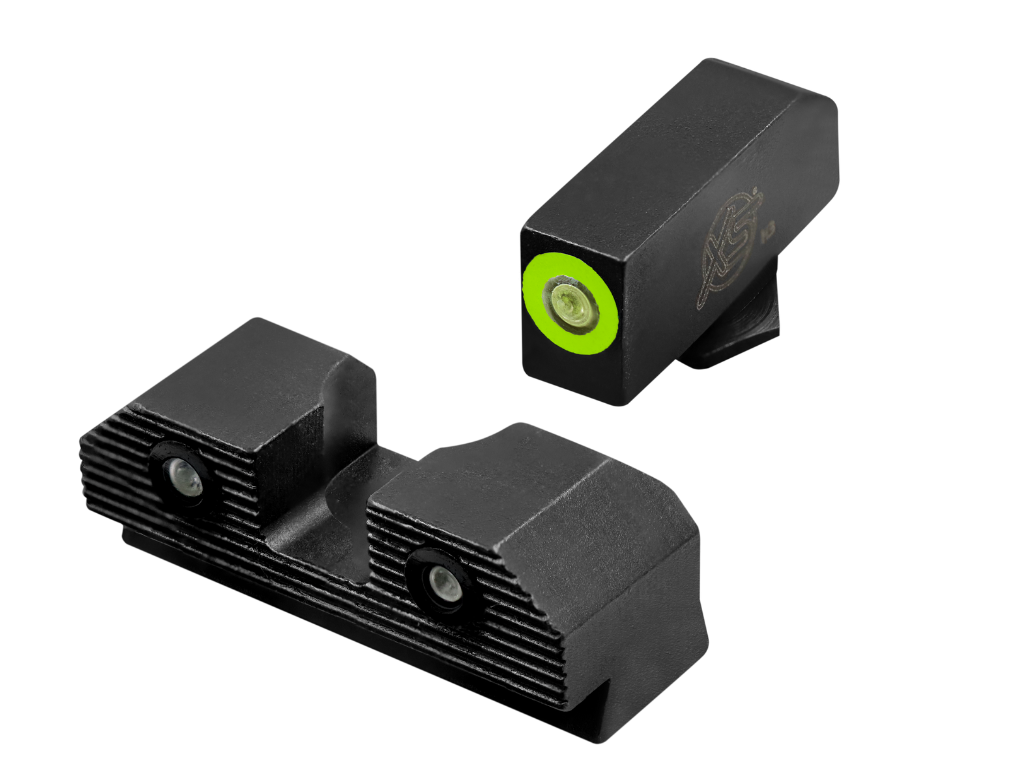
The rear sights differ on these two models. The R3D Night Sight has a traditional three-dot sight picture, with two dots on the rear sight. Each dot has a tritium tube to make aligning sights in total darkness possible. The F8 rear sight has a single dot, centered below the rear sight notch. To align the sights in darkness place the larger, brighter front dot sight directly over the small, glowing rear sight dot. During daylight both rear sights offer a crisp, uncluttered sight picture, promoting better accuracy at all distances. These are available for nearly any Glock model and are available in suppressor-height versions for your Glock MOS!
Installing and adjusting any Glock sight is similar. Let us walk you through the process.
Tools You’ll Need for Adjusting Glock Sights
If you happen to have an adjustable rear sight, then you can skip all of this. Follow the manufacturer’s instructions for adjusting point of impact using the adjustment screws. Since Glock sights are almost universally fixed, that’s what we are focusing on here. In this case, adjusting the sights involves actually moving them.
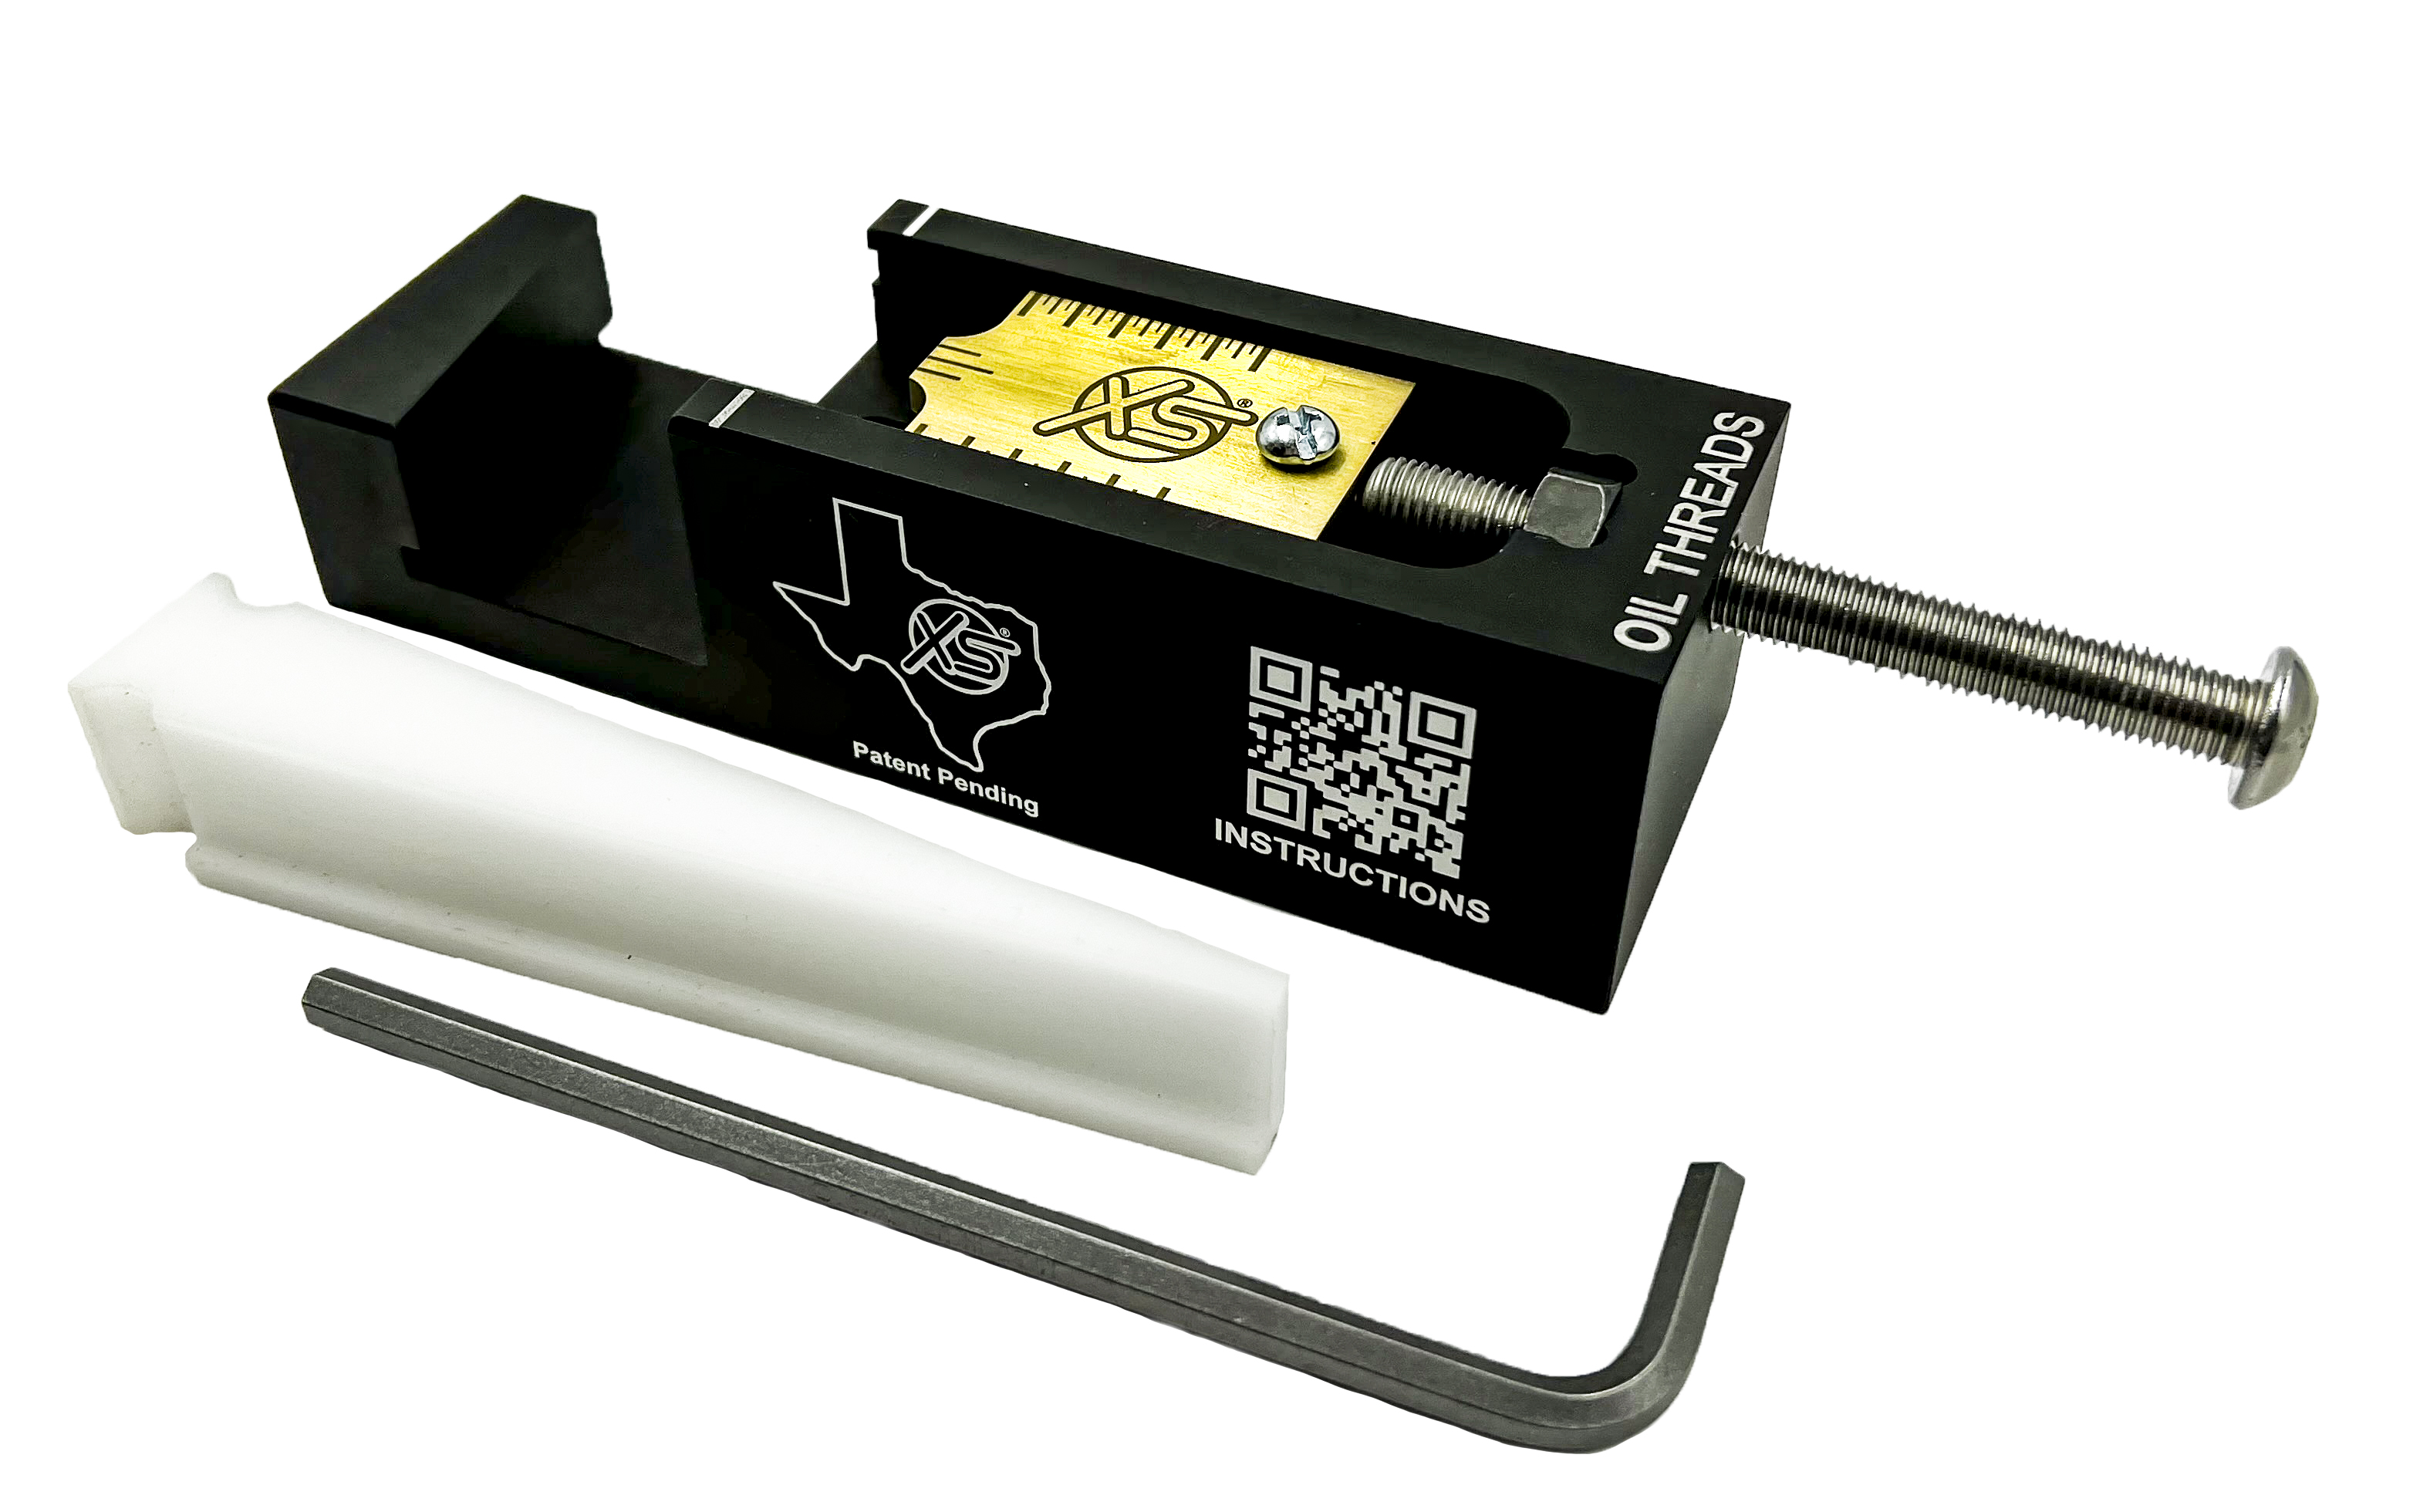
When installing or adjusting Glock sights, it’s important to have the correct tools. You can do it without the perfect tools, but you’ll need more tools overall and the job will be a lot harder. First, you need a sight pusher. The DIY sight pusher tool available from XS Sights is the perfect tool for this job. This special tool will let you swap out Glock sights at home with ease. It will also allow you to make precision adjustments to your Glock sights. It can even be used on Glock MOS models with a red dot optic installed.
In the absence of a sight pusher, you can use a mallet and a punch to push the rear sight out and hammer a new one in. You need a non-marring, brass or nylon punch. Without being practiced, this technique is far less precise. It also risks damaging the sights, especially an adjustable rear sight. And it requires more tools; you’re going to need a vise and blocks to secure your slide in the vise. For many it is easier and less hazardous to use a sight pusher tool. If you’re new to gunsmithing, you’ll probably wish you had, too.
There are a couple more things you’ll need. You’ll need a Glock front sight tool. This allows you to loosen the tiny screw that secures your front sight in place. Next, you’ll need a little bit of oil and some thread locker. Finally, if your new or old Glock rear sight is secured by screws, you’ll need an Allen bit to tighten/loosen them. Once you’ve assembled all that, the only other thing you need is a clean, uncluttered space in which to work. Luckily, all XS Sight pusher kits come with a front sight tool, thread locker, and oil included.
How to Adjust Glock Sights: Step-By-Step Guide
Now that you’ve assembled the necessary tools and equipment, let’s get started. Since Glock front sights are screwed in place, they are not drift-adjustable. As a result, all adjustments will be made on the rear sight. If using non-adjustable, fixed sights, they are adjustable for windage ONLY. The adjusted point of impact up, or down, with fixed sights requires installing a new taller, or shorter, front sight post.
Step 1: Preparing Your Glock Pistol
First, clear the pistols and remove any ammunition. Remove the magazine and lock the slide to the rear. Now check, double-check, and triple-check the chamber and magazine areas. Now remove the slide and set the recoil spring and barrel aside. Place the slide on a solid work surface.
Step 2: Adjusting the Rear Sight
If necessary, loosen securing screws in your rear sight. Place the slide into the sight pusher tool. This tool can be used to install and adjust Glock sights, making the interchange of suppressor and RMR-height sights a breeze. When adjusting your rear sight, the sight pusher tool has a scale that allows for precise adjustment. This lets you track how much you’ve moved the sight. Moving the sight left and right will adjust windage only.
[Important note: When adjusting handgun or rifle sights, remember the following mnemonic: Front Opposite, Rear Same (FORS). This means that if you need to move your Glock’s point of impact to the right, you need to move the rear sight to the right. If you need to move the point of impact left, move the rear sight to the left.]
Step 3: Test for Accuracy
After each adjustment, you need to test for accuracy. This verifies that the adjustment has had the desired effect or shows you that some more adjustment is in order. Again, tracking adjustments using the scale on the sight pusher tool is a breeze. Tracking adjustments using a hammer and punch is… guesswork at best. We recommend firing a benched, 5-round group at 20 or 25 yards. If the sights require more adjustment, start over at step 1.
Why Choose XS Sights for Your Glock Pistol
XS Sights offers some of the best, most innovative sights in the industry. From our revolutionary, fast-acquiring Big Dot to the R3D Night Sights’ huge upgrade to the traditional three-dot sight picture, XS Sights are superior. They offer fast target acquisition, better accuracy, and exceptional performance across all lighting conditions. With XS Sights you can be confident that your sights will be there and visible when you need them. There is an XS Sights model for every application, from duty to competition to self-defense.