
DIY Guide Building an AR
Posted by XS Sights on Apr 23rd 2021
With all the uncertainty that has come with 2020, the pandemic, civil unrest, presidential elections it's no wonder so many Americans have been stocking up on guns and ammunition this year!
If you're one of the many Americans that purchased firearms this year an AR might have been on your hitlist of purchases to make. You also might have then realized that it was near impossible to find a completed gun for sale, that wasn't on backorder during the early months of the pandemic.
Take it from your friends at XS Sights — building your own AR part by part is easier than you'd think!

In this blog, we'll break down what parts you'll need, provide some excellent building tips from our resident Gunnuts and Colt Armorer and give you some unsolicited opinions on the best way to build your AR at home.
Part I — Components
Before we jump into the build headfirst, here's a list of the components you'll need to get started.
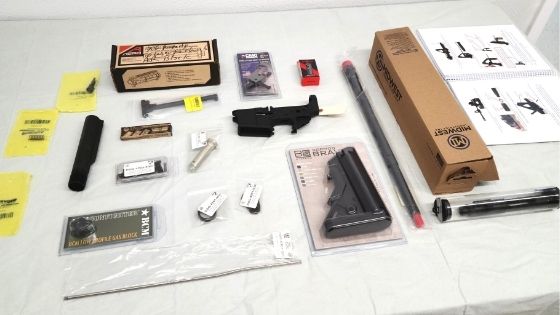
Upper:
- Receiver
- Barrel
- Forend
- Muzzle Device
- Bolt Carrier Group (BCG)
- Charging Handle
- Gas System
- Gas Block
Lower:
- Trigger
- Lower Parts Kit
- Stock
- Grip
- Buffer Tube
- Buffer
- Buffer Spring
Tools needed:
- Armorer’s Wrench
- Upper Receiver Block/Vise Block
- Lower Receiver Block
- Punches
- Screwdrivers/Hex Keys
- Cleaning Supplies
- Grease
- Oil
- Gun Scrubber
- Threadlocker (blue and red)
- Pivot Pin Installation Tool
- Gas Block Alignment tool
Part II — Building the Lower
We started by building the lower. Because we were working around a couple of other projects it took us two days to build the AR, we worked on it for an hour or so each of the 2 days. Starting with the lower on day 1 because we were waiting for our BCG for the upper to arrive! It's important to note that there's several different order of operations that this type of gun can come together in. Just because we started where we did does not mean you have to.
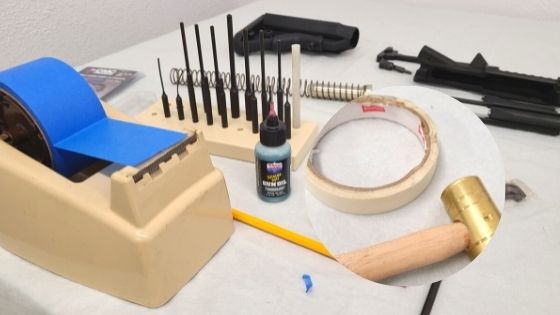
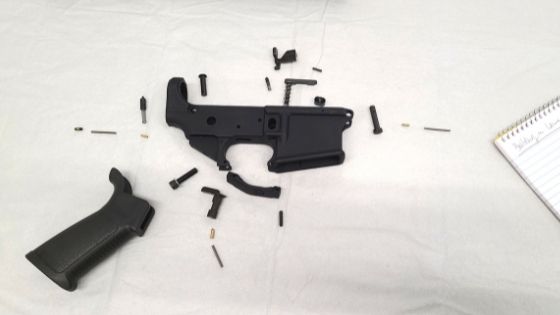
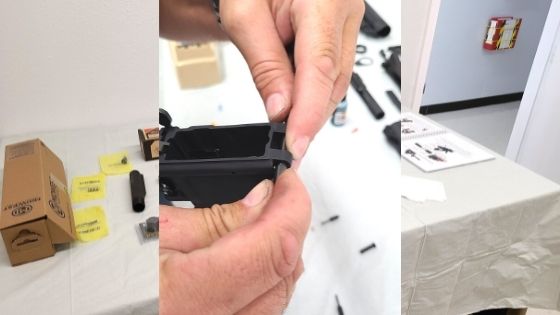
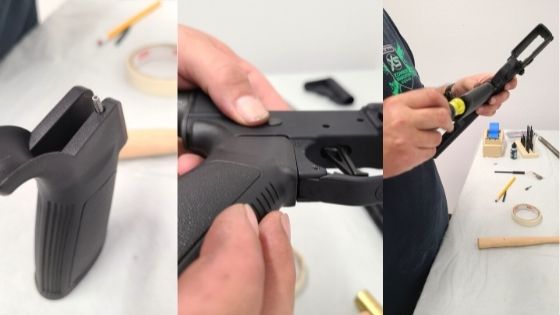
We grabbed our lower receiver; we used a TacPro Shooting Center TPSC-15 aluminum lower that we got from our friends at TacPro Shooting Center. Then checked to ensure we had all the lower parts that were needed laying out with us including a punch set, a roll of masking tape, a hammer, a pencil with an eraser, oil, microfiber cloth, and degreaser. We started by installing the Magazine catch button that came with our DSG Lower Parts Kit.
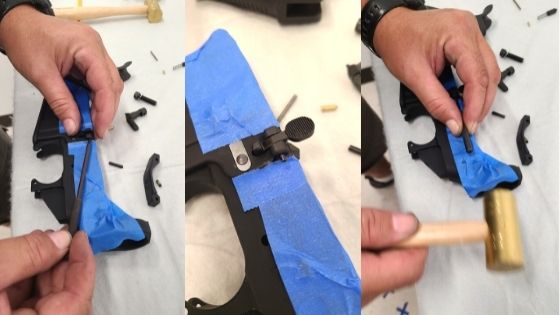
We applied masking tape to each side of the lower receiver to ensure we didn't scratch up our brand-new metal upon initial installation! We depressed the button and spring as much as possible using the eraser of a pencil and then screwed in the hold from the other side of the receiver.
ProTip! After screwing in the button depress it and ensure that the handle on the other side cannot unscrew itself or come loose, if it is too loose, make another turn or two until when you use finger strength to depress it can no longer come out of the hold.

Installing the bolt catch was next, for this one insert the spring and plunger, then the bolt stop. Before punching in the roll pin, be sure to add masking tape so you don't hammer or mar the receiver surface. Then punch the roll pin into place.
Pro Tip! An AR punch set with a starter tip is an excellent tool to have, especially if you plan to build multiple firearms yourself.
Now that it’s installed, insert a magazine to check the function. Ensure the top of the mag follower engages the lip of the bolt stop lifting it upward.
We then screwed the castle nut and slipped the endplate onto the buffer tube. (We also picked those up from DSG) With those back and out of the way we inserted the buffer spring detent and screwed in the buffer tube to cover its edge and hold it in place. We inserted the smaller detent and spring on the rear face of the receiver. Then with finger pressure, cover the spring with the endplate and screw the castle nut until it snuggly fits down near the joint of the buffer tube and the receiver.
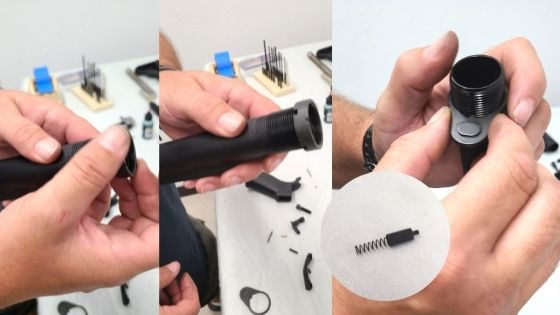
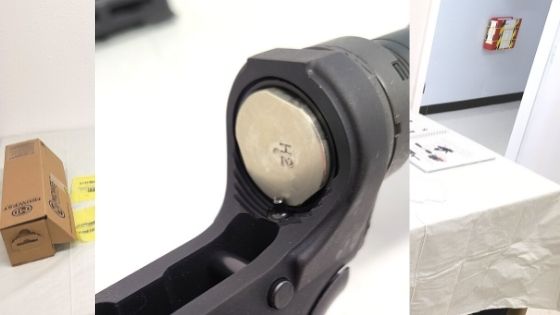
At this point, we tested out the buffer tube and inserted the H2 Heavy Carbine buffer spring and buffer itself in. It was a good fit, so we removed it and continued with the remainder of the lower parts.
Next, we installed the takedown pins starting with the rear. Simply slide them into place, add your pin and rotate until it locks. Once they're in, you can work them back and forth or add a bit of oil or grease if they're stiff.
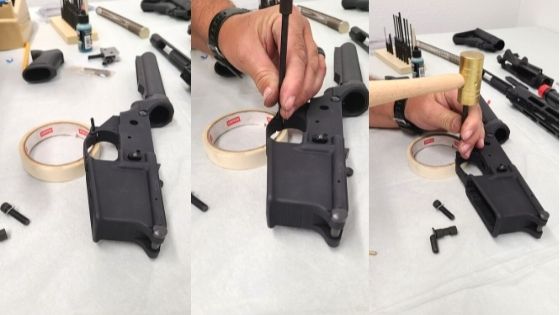
Then we installed the trigger guard. Grab your roll of tape and punch set! For many folks at home, it's very easy to break off the ear of the aluminum if you're not careful when installing the trigger guard.
ProTip! The roll of tape comes in very handy here as a soft elevated brace to hammer your small pins into place to hold the guard.
ProTip! This is also a great time to use a starter punch as we mentioned earlier.
Next, we installed the drop in CMC single-stage flat trigger we had.
ProTip! Drop-in triggers are any easy no-fuss way to get a quality trigger in your firearm.
Then, we installed the safety selector. We dropped the larger detent located under the receiver and spring located in the grip in and screwed the grip into place to hold them.
ProTip! Use a long-stemmed hex screwdriver to secure the handle in place.
Now, check your safety selector and ensure it will turn correctly, and when on safe, keep the trigger from depressing.
ProTip! When pulling the trigger in this instance be sure to support it with your free hand so that it won't slap the surrounding material and get damaged.
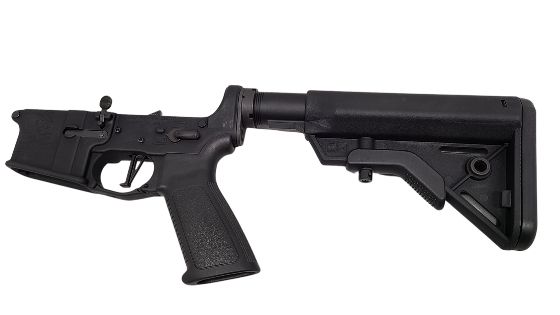
Now add on the B5 Sopmod Bravo buttstock and ta-da! The lower is completed. You can pat yourself on the back.
Part III — Building the Upper
Day 2 of our build rolled around, and our BCG arrived so it was time to build the upper!
We have an XS Armorer's block that came in very handy for the second part of this build.
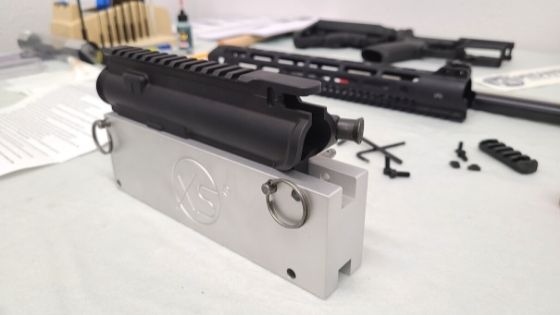
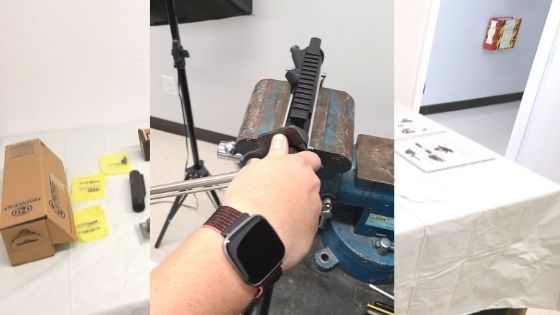
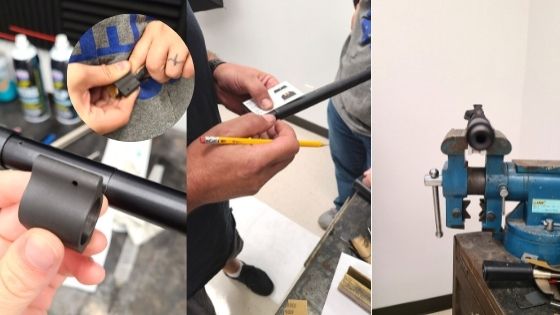
We started by assembling the upper onto the block and loading it into the vice, then we connected the upper to the Brownell’s 18" MK12 1-7 barrel, screwing in on.
Next, it was time to add the gas block! We used the BCM low profile gas block. This was a snug fit and took a bit of sanding off the material to get it to slide onto the stop on the barrel.
ProTip! When trying to align the gas block with the barrel’s gas port, a pencil and business card or index card can be a very simple and cost-effective solution.
It's also smart to do a visual check down the barrel to ensure everything looks good.
Once the gas block was lined up, we installed the DSG Rifle Length gas tube. It's important to line the holes up correctly and to install this from the end near the receiver and then into the gas block. Once they are aligned, use a punch and gas tube roll pin to secure them into place.
ProTip! Back the barrel up to your chest as a brace when punching in the pin for additional support.
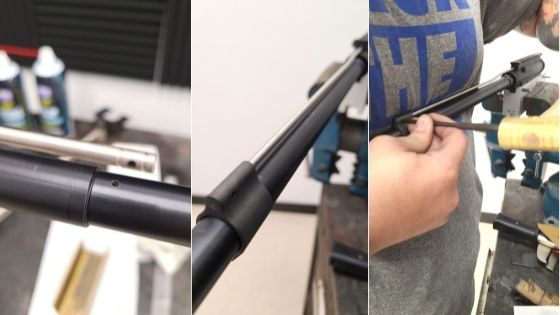
On to the muzzle device! We chose a Surefire Procomp Muzzle Break. Screw on the device and the provided washer until you have a snug fit that leaves the port facing upwards. We used an Armorers wrench to get this snugged down.
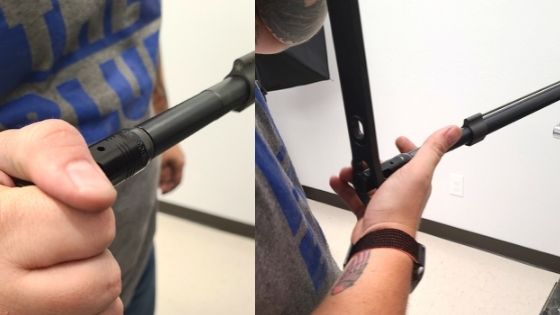
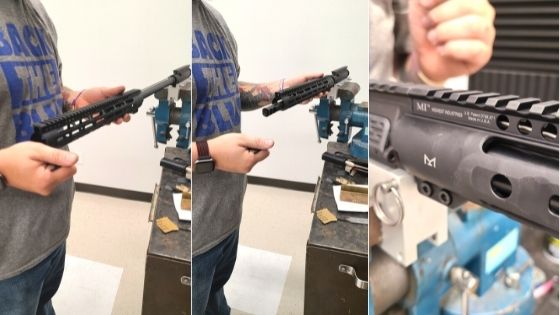
Now it was time to add the handguard, we used a Midwest Industries Freefloat Slimline Handguard with a rail along the top to hold sights and accessories. We installed it according to the manufacturer's instructions listed in the packaging.
We dropped in the Brownell’s charging handle; the gas key fits up into that system. We'd recommend lightly oiling the top of the charging handle to help remove any friction and initial wear that may occur.
BCG! Our resident Colt Armorer checked out the BCG and ensure that it was functioning properly using go and no-go headspace gauges. This step can give you additional confidence in your firearm and helps to identify potential round fit problems before they arise.
ProTip! If you don't have the equipment to check this out for yourself, call your local gunsmith for assistance.
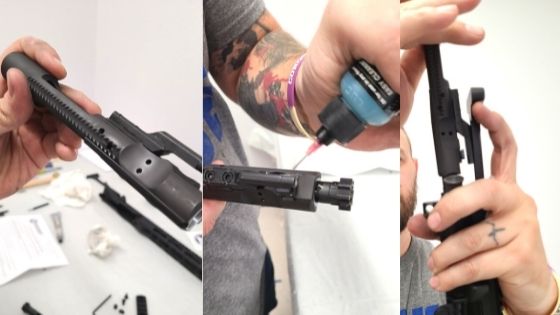
We used a BCG from our friends at Lone Star Armory and oiled all the touching components and joints where the BCG would see the most action before installing it into our upper.
Next, we added the UDC ejection port cover which was spring-loaded and then slipped in the forward assist spring, button, and roll pin from Brownell’s.

All that was left to do was open the takedown pins, connect the upper and lower and our AR was complete! We did several function checks on all the components. Realizing it worked well we stopped to admire our handiwork and to dream up what accessories we'd like to add on the bad boy in preparation for shooting!
Part IV — Accessories
Optics - Red Dots such as the Aimpoint Comp family or the Trijicon MRO tend to be good all-around options, but they are not magnified can only be used as far out as the shooter can see with unaided vision. Magnified optics tend to allow increased visual capabilities at greater distances but can be difficult to use up close. Both are great options to consider depending on your intended use for the rifle. If you’re going with an optic, pick what works best for you.Slings – Is a sling right for you? Two-point slings are very common at the moment and an adjustable two-point is very versatile. Single points are great for working in and around vehicles but do not offer as good retention or support as a shooting aid. Three-point slings are becoming less and less common. If you choose a sling, pick the type that works best for your most common intended use cases.

Conclusion
Sights – We outfitted our newly formed AR 15 with XS XTI2 45° offset sights. They are a close-quarters, secondary sighting solution for a fast sight transition from a magnified primary optic. XTI2 sights reduce target engagement time and eliminate magnification adjustment. They feature taller bases than our Gen 1 version for easy sight alignment, without having to break a standard cheek weld. Additionally, the base angle has been increased to accommodate wider lens optics. The front sight measures 0.140" wide and feature an Orange Ember Glow Dot. The straight-line express sight picture makes XTI2's ideal for rapid sight acquisition and close target shooting. Check out XS’ other great AR sighting solutions for your firearm.
Building an AR is easier than you think! When it comes down to it if you’re a tinkerer like many of us here at XS then you can find the time, drive, and resources to build one for yourself right at home.
For beginners interested in building one, we highly recommend it! There are so many online resources like this blog, videos, and other places for you to find the tools and information to make this happen.
All you need is a little time and patience.
About the Author:
XS Sights is known for making the fastest sights in any light. For more than 20 years, the XS team has created some of the most innovative sights on the market today for pistols, rifles, and shotguns. Whether used for personal defense or hunting, these sights are designed and built to be the absolute best for their specific purpose. American Made. Texas Proud. 2A Strong.