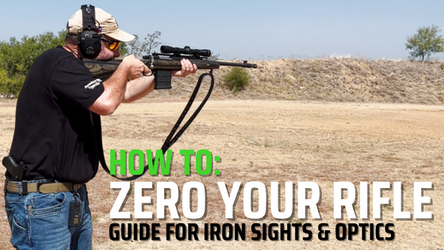
How To: Zero your Rifle with Iron Sights and Optics
Posted by Monte Long on Sep 23rd 2022
Welcome to September in Texas! Y'all know what that means, right? If you guessed "Hot as hades," then you're right. But it also means that you should be getting ready for hunting season 'cause it's only about two months away.
By getting ready, I mean making sure you're scouting your hunting area, ensuring your feeders are working, and getting your rifle(s) zeroed and ready to go.
For those that might be new to firearms, zeroing a firearm is the process of getting your sighting system set up so that, provided you do your job right as the shooter, your bullets go where you want them to go. There are many thought processes regarding what distance you should zero a rifle.
We'll talk about some of them, and I'll walk you through zeroing a couple of rifles I will be working with between now and the end of whitetail season (assuming I get the opportunity to get out and hunt a bit).

At what distance should I zero my hunting rifle?
Once your sighting system is installed and bore sighted, the next order of business is to decide what distance to zero at. Figuring that out is entirely up to you, the shooter, and how you plan to hunt with the rifle.
For this article, I'm working with two rifles – a Marlin 1894 in .357 Magnum and a Ruger Gunsite Scout Rifle in .308 Winchester. Let's discuss my thoughts on the differences in how I will zero these two rifles.
The Marlin is primarily intended as a quick, handy carbine while I'm out wandering around on my parents' land. It's a nice mix of open pasture, creeks, and heavy underbrush. The Marlin is dedicated to walking around on the other side of the creek – lots of brush and not a lot of distance that you can see. I've typically got a scoped carbine if I'm working in the pastures feeding horses, working on fences, or running the brush hog.
I lucked into a decent amount of Speer .357 Magnum 125-grain Gold Dots to feed it. Out of that little 16" barrel, it's cooking –my LabRadar tells me the bullets are heading down range at 2,300 feet per second. Between the velocity and the sights being close to the bore, a 50-yard zero looks like the way to go. From the muzzle to 90 yards, the point of impact will be within an inch of my point of aim. At 100 yards, the point of impact will only be about 1.25" low. That should work just fine for the intended purpose.
The Ruger Gunsite I zeroed with Federal 150 grain PowerShok jacketed soft point hunting ammo. For the iron sights, I settled on a 100-yard zero. It's simple, easy, and will work fine to 150 or so yards, just in case the scope fails. For the Leupold Scout Scope, I did a bit more thinking.
The chronograph told me the bullets started at 2,650 feet per second. A little work with a ballistics calculator, and I settled on a 150-yard zero. With a 150-yard zero, the bullet should be within 3 inches of point of aim to about 200 yards and within 4 inches of point of aim to about 250 yards. With a 2.5 power scout scope, I don't want to take a shot on a game animal much beyond 200 yards, but if I decide to, I should be able to hold the center of the thoracic cavity and get an acceptable hit in the heart, lungs, or all three.
Simple Math: Zeroing your Rifle Sights
Once I decided on zeroing distances, it was time to do some math! Hold on! I know math wasn't my favorite subject either, but this is pretty straightforward.
I don't like wasting ammo (especially in this economy!), so doing some prep work should help me save some ammo once I get to the range.
Before heading to the range, I wanted a reasonable idea of how much POI would move for a given adjustment of the rear sight. To get that info, we need three numbers. We'll need to know zero distance, sight radius, and how much the rear sight moves for a full revolution of the aperture.
Here's the formula:
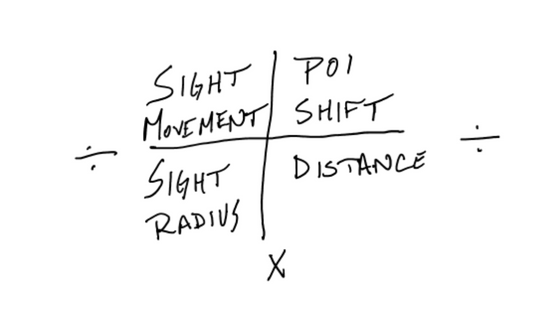
The sight radius is pretty simple – measure the distance between the front and rear sight.
In the case of the 1894, it comes out to 20".
Zero distance is also pretty easy. As I mentioned above, I decided on a 50-yard zero. The only hiccup is for the POI change formula, and I'll need that information in inches. That's a relatively straightforward task of multiplying 50 (the yards) by 36 (the number of inches per yard), reaching 1,800.
The XS Ghost Rings have both windage and elevation adjustments. The aperture threads up or down to adjust elevation, and the screws that lock it in place are used to adjust the windage.
Zeroing the Marlin 1894
Let's start with the Marlin 1894. We need to know how much the aperture moves in a full rotation to determine how much the POI will shift at a given distance. To do that, we need to know the thread pitch of the aperture. All XS apertures have a 64 thread per inch (TPI) pitch. That means that, for an inch of movement, there are 64 threads. To determine how much movement we get out of a single revolution of the aperture, we'll need to divide 1 (the inch moved by 64 revolutions) by 64 (the thread pitch). That comes out to .015625 inches of movement in a complete revolution. Since both the aperture and the dovetail slide that it threads into have tolerances, and since I'm not always so good with math, we'll round that to .016" per full revolution.
Next up, we'll need to determine what that translates to in shift of impact. We'll start by dividing .016 (the movement of the rear sight) by 20 (the sight radius of the rifle), which comes out to .0008. Next, we multiply that by the distance we're zeroing at, which is 1,800. That number comes up as 1.44". So, for every full revolution of the aperture, the point of impact will move about 1.5" (again, tolerances on both parts and math without a calculator are not always my strong suit, so I'm rounding to make life easy at the range). That also means there should be about a .75" shift in POI for a half-turn on the rear sight.
For windage, the screws are a 40 TPI. So, for one full revolution, the screw is moving .025". Dividing that by 20 and multiplying that by 1,800 gives us the result of a 2.25" shift in impact per full revolution of the windage screw.
Zeroing the Ruger Gunsite Scout Rifle
The Ruger Gunsite Scout also uses an aperture with threads at 64 TPI and, coincidentally, has a 20" sight radius. However, I zeroed it at 100 yards. That means that every revolution is going to move the POI by 2.88" [(.016/20)(3600)=2.88].
Windage is also different.
The windage screws on the Gunsite Scout are 32 threads per inch. That works out to a 5.6" shift per full revolution [(1/32)/20)*(3600)=5.6].
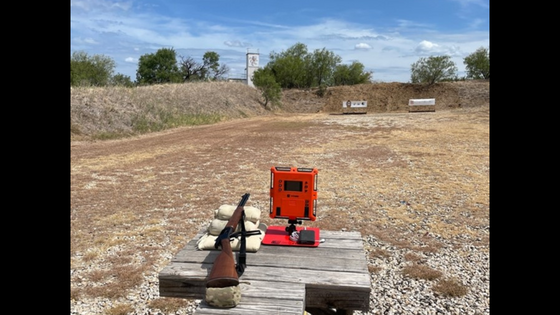
With that figured out, it was time for the range.
How to Zero your Rifle with Iron Sights
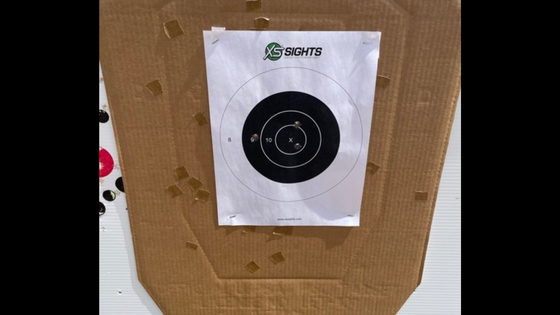
I fired the first group out of the Marlin and had a group that was about 10.25" high (I was holding at 6 o'clock on the bullseye to put the group as close to 6 o'clock as possible – I wanted the group to impact at the top edge of my front sight, and that's the easiest way for me to keep a consistent hold).
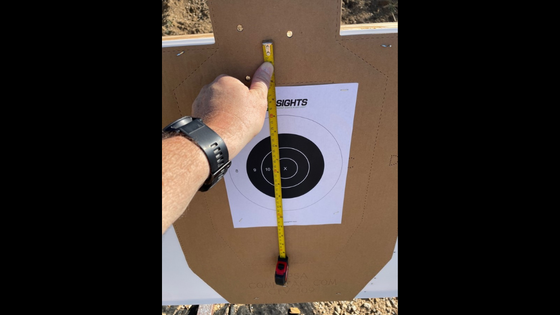
The rear sight only had three full revolutions of downward movement, which works out to 4.5", which wasn't enough. That meant I could save ammo – I knew I couldn't zero the rifle with the front sight I had installed. It happens occasionally.
Working the formula from above backward (10.25" of POI shift divided by 1,800 comes out to .005694 multiplied by 20) tells me that the front sight needs to be about .114" taller to zero correctly. That was a bummer, but saving the ammo was nice. Once I was back in the office, I swapped the front sight for one that was taller and was ready to go for the next time.
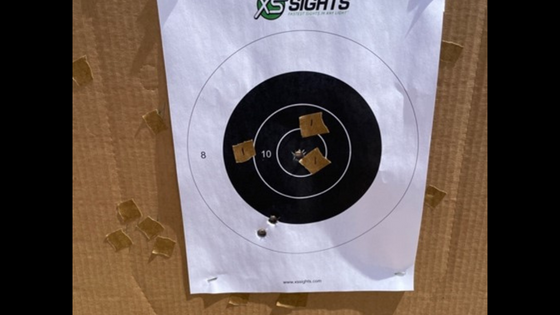
For round 2, the first group was centered for windage but impacted about 2.5" high:
I screwed the aperture in 1.5 revolutions (1.5 revolutions * 1.5 inches per revolution =2.25" total shift in impact) and fired again:
Not my best group, and definitely not one to stop on. I settled back in behind the carbine, remembered the fundamentals, and put three more rounds down range:
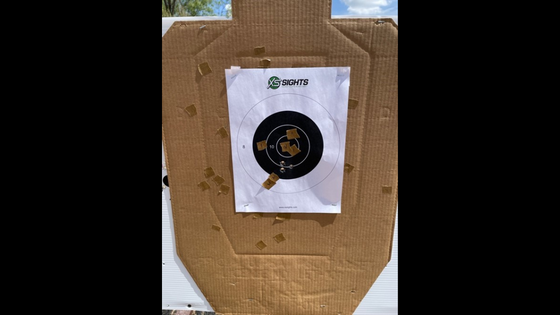
That wasn't too bad.
The group is a touch high, but a half revolution on the rear aperture would have put me just under my point of aim. If I can't get the exact zero, I prefer to be just a little high rather than low.
How to Zero your Rifle with Iron Sights and an Optic
Now it was time to get the Ruger squared away. I started with the irons. While the optic is mounted in Leupold QRW rings that, in my experience, tend to return to zero pretty well, I'd prefer not to install and remove the optic and expect it to return to zero. Surprisingly, the irons were on with the first group (sorry, I didn't get a photo of the target).
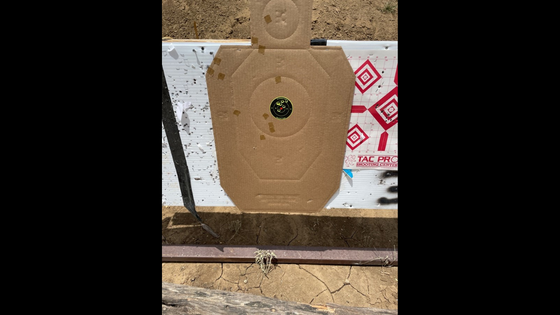
With the optic installed, I had previously run the ballistics and determined that at 100 yards, I needed to be about .75" high at 100 yards for a 150-yard zero. I benched the rifle and shot the first group at 100 yards holding on the red dot in the center of the Shoot-N-C target:
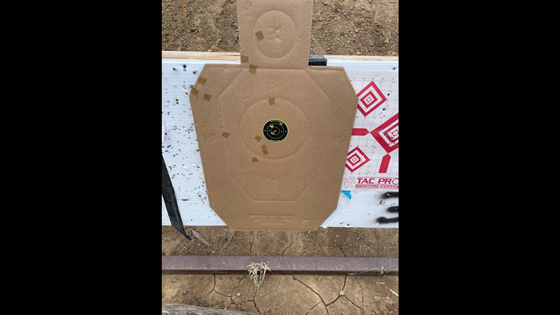
Not too bad. The center of the group was about ½ inch high.
I dialed up one increment (on the Leupold, the adjustments are ¼ MOA) and fired again:
For shooting at 100 yards, that's sufficient. The next step should be shooting at a true 150 yards.
Unfortunately, the range was pretty busy that day, so I didn't have the opportunity to set up a target at 150 yards and get a true 150-yard zero. Before I get out in the field with the rifle, I will want to do that. The ballistics programs that are available now are very, very good, but nothing trumps actually shooting at the intended distance.
Hopefully, you'll find this info helpful when you get out to zero your rifles. Get out there, get them zeroed, and prepare for hunting season!

About XS Sights: XS Sights is known for making the fastest sights in any light. For more than 25 years, the XS team has created some of the most innovative sights on the market today for pistols, rifles, and shotguns. Whether used for personal defense or hunting, these sights are designed and built to be the absolute best for their specific purpose. American Made. Texas Proud. 2A Strong.