")
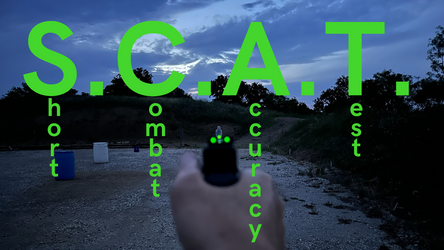
Short Combat Accuracy Test (SCAT)
Posted by Monte Long on Sep 11th 2023
All right guys and gals, it’s time to set your sights on another drill! Following on the previous drill where I was working on a concealed draw, let’s do another concealed carry/EDC drill! It’s time to talk about SCAT!
For those that might have grown up around a farmer or rancher, the term “scat” might bring up thoughts of what comes out of the southbound end of a northbound critter. Or they might think of using the term to tell someone to go away (cue John Bernard Books). But what we’re really talking about is the Short Combat Accuracy Test (in this case, it’s the modified version) from Tom Givens at RangemasterFirearms Training.
If you haven’t been to one of Tom’s classes before, I highly recommend it. Tom spent 25 years in law enforcement before opening Rangemaster with his wife, Lynn. I’d attempt to list some of his certifications, but that would make up a blog all on its own. Speaking from personal experience, Tom is a great instructor. His newsletter is a must read every month.
Speaking of the newsletter, this drill was featured in Tom’s newsletter from February 2021, though that’s not where I found it initially. I first found it in one of my favorite training resources, John Daub’s Drills, Qualifications, Standards & Tests which is available as a free download. John’s book is a compilation of drills that he’s found over the years and it is definitely a good resource to have on your bookshelf. I’ve got the digital file saved on my phone, a printed hard copy in the office and one on my bookshelf at home.
So how do you shoot the drill?
As the name implies, the SCAT is a pistol drill to test concealed carry fundamentals. There are seven strings of fire for a total of 20 rounds, with distances of 5-10 yards. You can gather quite a bit of data for less than half a box of ammunition and just a few minutes of time. You’ll need your carry gun (obviously), one magazine, a timer and a target. As written by Tom, you should use an RFTS-Q or an IALEFI-QP target. Since I generally don’t have those, I used an IDPA and modified the scoring a bit (more on that later).
This drill is scored using hit factor. You’ll shoot the drill and total up all your times on the various strings of fire. Then, you’ll score your total points for the drill and divide that by total points, then multiply by 12.5. According to Tom’s writing, the scores breakdown like this:
100-125 is competent.
125.1-140 is advanced.
140.1 and up indicates the shooter has a very strong set of fundamental skills.
If you’re using the RFTS-Q or IALEFI-QP, hits in the head or center chest ring are 10 points. Hits in the outer chest ring earn you 6 points per hit and anywhere else on target above the belt line gets you two points per hit. Like I said, I don’t typically keep either of the options Tom lists on hand, but I do generally have USPSA and IDPA targets available. I used an IDPA target for this one (it’s got round scoring areas rather than rectangles, so it’s a bit closer to what the drill calls for). So, for an IDPA target, I used 10 points in either circle, 2 points for a hit in the (-1) area and 0 points for any other hits. Why make life easy, right?
The strings of fire are:
- Draw and fire 4 rounds to the chest at 5 yards.
- Fire one round to the head from ready at 5 yards.
- Repeat the second string.
- Fire 3 rounds to the body from ready, strong hand only at 5 yards.
- Fire 3 rounds to the body from ready, support hand only at 5 yards.
- Draw and fire 4 rounds to the chest from 7 yards.
- Draw and fire 4 rounds to the chest from 10 yards.
Easy, right? Deceptively so. With a low round count and going for a combination of points and speed, it’s not terribly difficult to outrun your headlights and lose a round out of the high-scoring zone. I didn’t do that when I shot the drill (this time), but it’s entirely possible.
For the first string, set yourself up with a good stance. Make sure you get a clean draw and a good grip. 5 yards is reasonably close, so you can push your speed a fair amount on the first string, just make sure you’re seeing enough to get good hits. As you’re presenting the gun, try and track the sights in your peripheral vision as the gun comes up to the target. If you can, you want to break the first shot just as your arms get to your full extension. Drive the gun through recoil while prepping the trigger so that you can break the shot as soon as the front sight comes back into the circle will help reduce the time.
For the headshots, again, track the sight in your peripheral vision as you present the gun on target. Try to begin prepping the trigger at about halfway through the presentation with a goal of breaking the shot just as you get to full extension. Even though you’re only firing one shot, remember to follow through and be ready to take another shot.
When you get to the one-handed strings, work on gripping the gun tightly and pay attention to the trigger press! With only a single hand on the gun, it’s considerably easier to disrupt the sights and send the round outside of the scoring zone. For me, I’ve always found that I get better sight tracking if I can’t the gun inboard about 10-15° when I’m shooting one-handed. Note, I’m not going full gangster, just a slight cant.
When you move back to the 7- and 10-yard strings, they’re basically a re-run of the initial 5-yard string, just a bit further out. You might find that your cadence slows down just a little bit, but you are 50-100% further from the target. Your hand movement to the gun and presentation to the target should be the same as the 5-yard string. The first round of the strings might be slightly slower, but that should be due to refining the sight picture just a bit more and not because your movements were slower. The split times (time between shots) might be a bit slower but again, you’re a bit further from the target so you might take a fraction of a second longer to refine the sight picture between shots.
How’d it go?
So, how did I do? Not too bad. On the day that we filmed, I shot the drill twice. Both runs were with my CZ P-10C equipped with a set of DXT2 sights with an Optic Yellow front sight. The appendix inside the waistband (AIWB) holster was made by JM Custom Kydex. I was focusing on getting good hits and didn’t try to push speed – I wanted to shoot the drill clean. The accuracy focus paid off, and both runs were clean. Times were:
| String | 1st Run | 2nd Run |
| 1 | 2.87 | 2.31 |
| 2 | 0.82 | 0.98 |
| 3 | 0.91 | 0.91 |
| 4 | 1.86 | 1.9 |
| 5 | 2.58 | 2.77 |
| 6 | 2.76 | 3.07 |
| 7 | 3.13 | 3.31 |
| Total: | 14.93 | 15.25 |
That gave my first run a 167.4 (200/14.93=13.39*12.5=167.375) and my second run a 163.93 (200/15.25=13.11*12.5=163.93). Not too shabby, and very consistent between the two runs. I do wish I had written down the draw times on both runs because, as I mentioned previously, I’m putting some dry fire time into concealed draws.
The next time you go out to the range for a practice session, take your EDC pistol with you and give this one a try! If, like me, you typically carry concealed, make sure and shoot it from your typical CCW setup and see how you do. Pistol drills like this are a great test of your EDC ability. If you do shoot it, send us an email and let us know what you think!